Table of Contents
ACTIVE DIRECTORY - WINDOWS SERVER 2012 R2
Active Directory (AD) is a directory service for use in a Windows Server environment. It is a distributed, hierarchical database structure that shares infrastructure information to locate, protect, manage, and organize computer and network resources, such as files, users, groups, peripherals, and network devices.
1. Topology
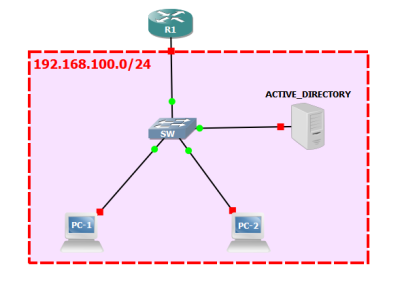
For the Active Directory service, a simulated network scenario is carried out with the GNS3 program, where we are going to use a Cisco router with the DHCP service, a virtual machine with Windows Server 2012 R2 Standard and two client virtual machines with Windows 7 Professional. The topology for this scenario is shown below.
The following table shows the information of the devices, IP address and operating system.
This network laboratory is carried out on a computer with the following characteristics:
2. Router Configuration
2.1 IP addressing and network interface configuration
The IP address of the Router (Network Gateway) is configured, where the configuration is applied to the network interface that connects to the local network.
The following image shows the IP address settings on the local interface.
2.2 DHCP Server
The DHCP Service configuration for the delivery of dynamic IP addresses to the network segment is performed. To configure the DHCP in the Router, specify the network address with its subnet mask, the DNS which would be the Server IP.
The following image shows the DHCP service configuration on the router.
3. Active Directory Server Configuration
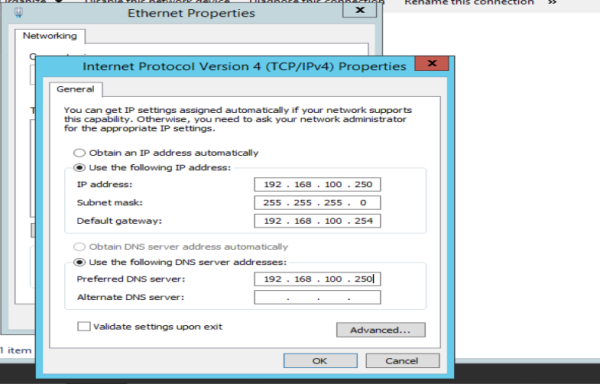
3.1 Server IP address configuration
3.2 Active Directory Configuration
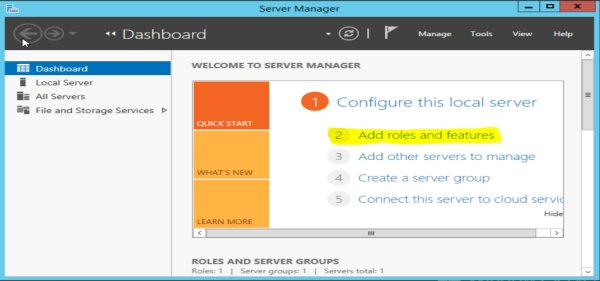
To configure the Active Directory service, we are located in the Windows Server Server Manager. On the initial screen, we choose the Add Roles option.
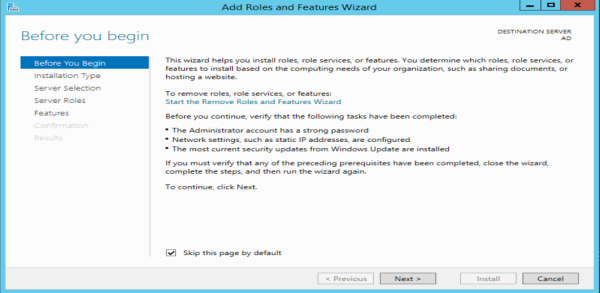
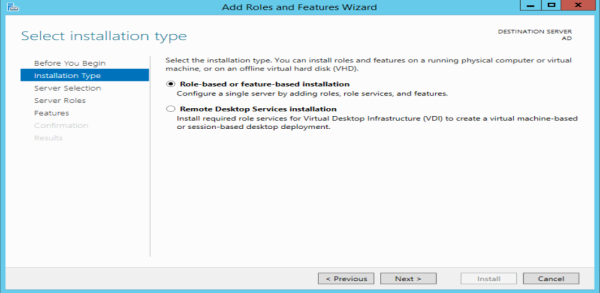
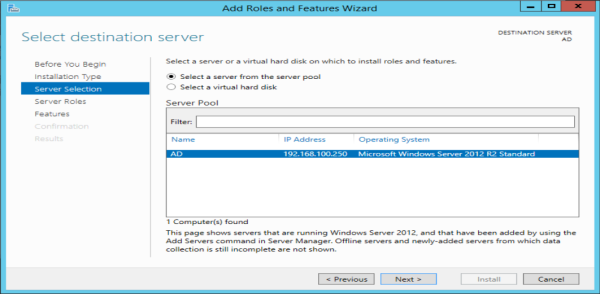
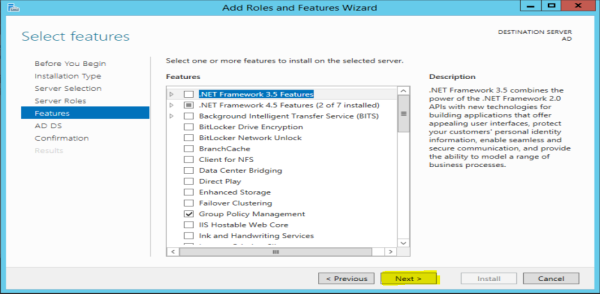
The initial wizard for the installation of roles on the Server appears. We follow until we get to the roles.
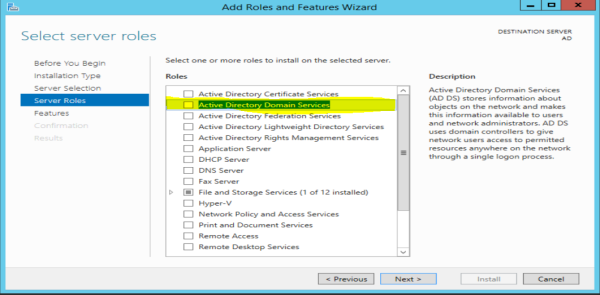
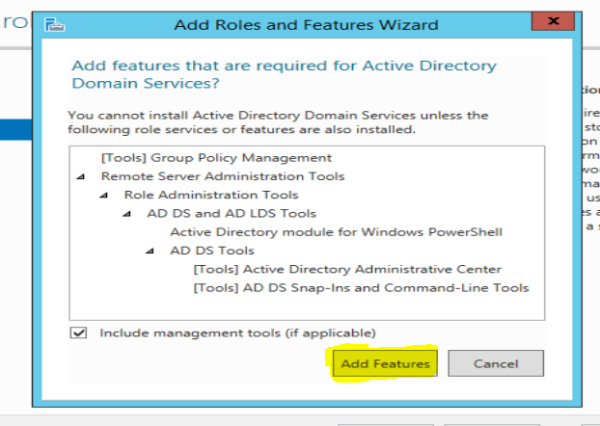
In the roles, we choose the Active Directory Domain Services option.
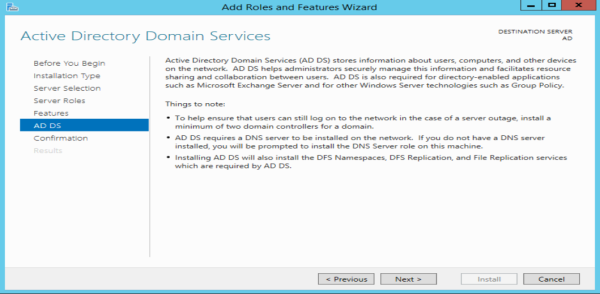
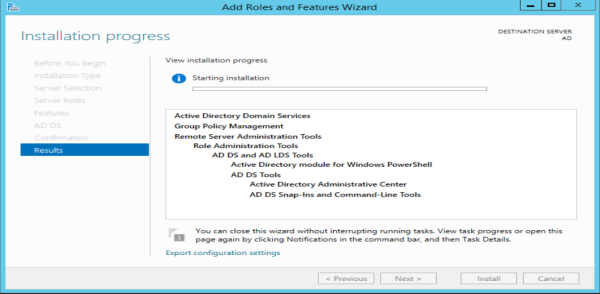
We follow everything until we reach the final confirmation of the installation of the service or role.
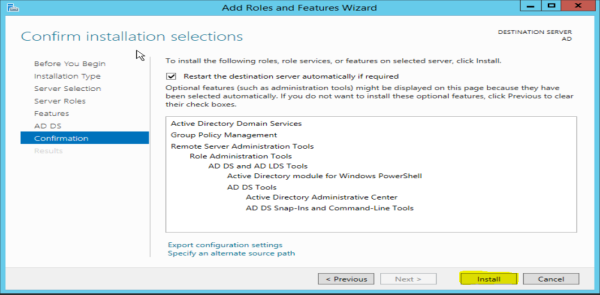
In the final confirmation, it shows us a summary of the role that we are going to install. We select the option of automatic restart of the server if it is required and we click on Install.
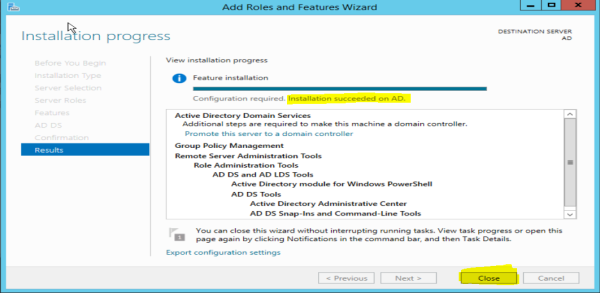
Let's wait until the installation is complete.
After completing the role installation, we proceed to configure the Active Directory service.
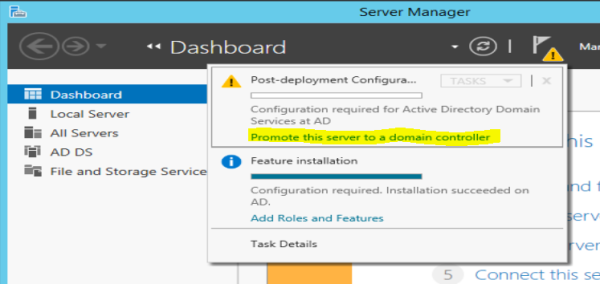
In the server administrator, in the notification area, we select the option promote this server to a domain controller.
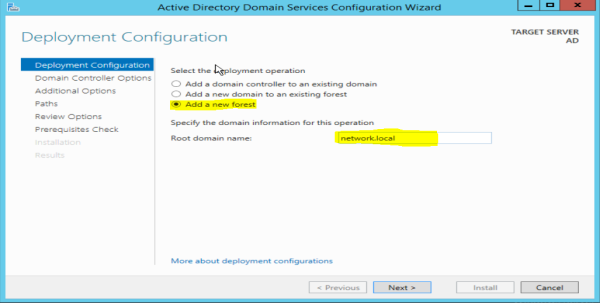
In the initial configuration of Active Directory, we select the option to Add a new forest. For this scenario, we put as domain: network.local.
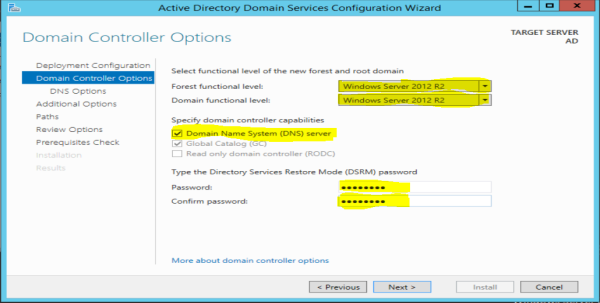
n the Domain Controller options, we set the functionality level to the same version of the current operating system. It is also important to install the DNS Service, which is essential for the Active Directory to function. In the same way, a recovery password is established in case it is required.
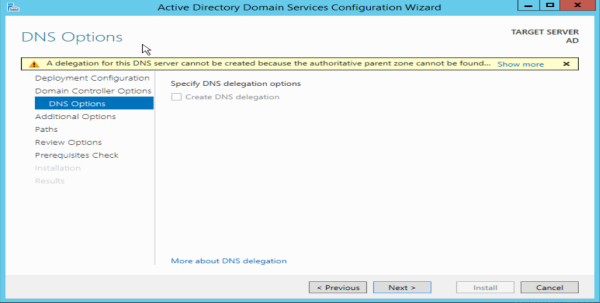
In the DNS option, it is left as is.
In the additional option, in the NETBIOS name we will leave it as it is.
The Active Directory files (Database, log files and more) we leave it as it is.
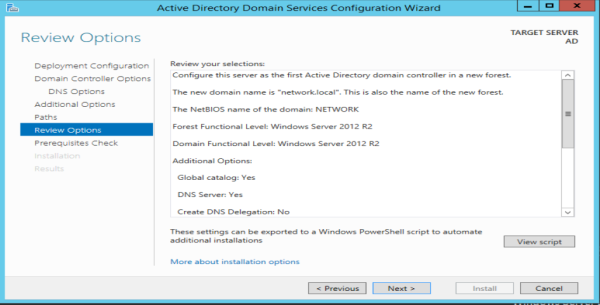
The Active Directory configuration is then verified before proceeding to install. If we agree with what has been done, we click next.
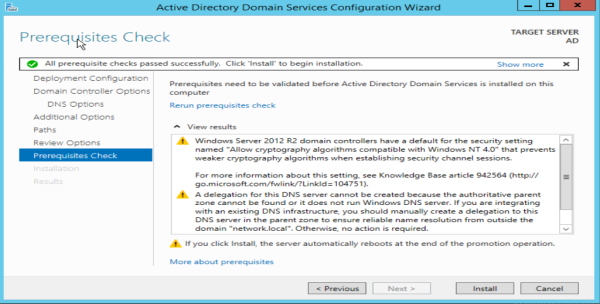
Certain requirements are checked before proceeding to install.
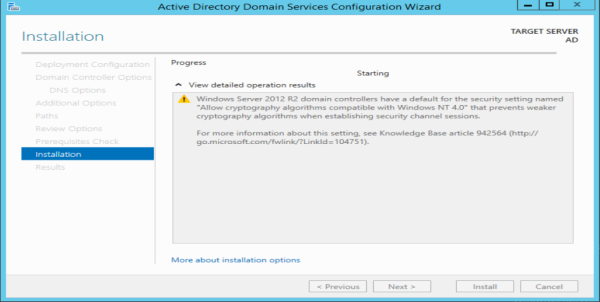
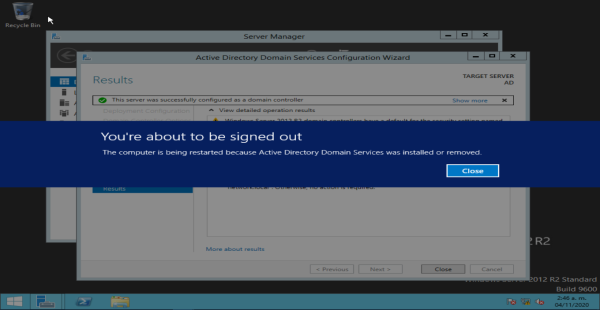
Then proceed to install the service and wait a few minutes until the installation is finished. The Server will restart automatically (If we select automatic restart during the initial installation of the role).
3.3 Create organizational units and users
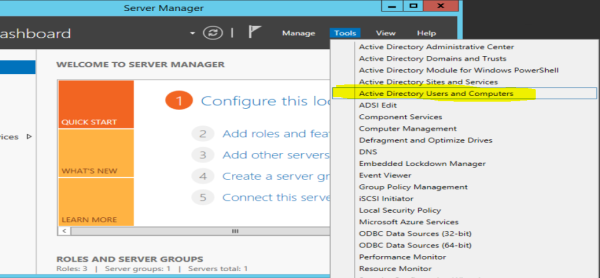
After restarting the server, the Active Directory role has been installed. From the Server Manager, in the tools we choose the Active Directory Users and Computers option where all users, computers and other components that are part of this role are managed.
Two organizational units will be created that will correspond to each computer that is shown in the network topology.
NOTE: The organizational units allow us to create the hierarchy of our organization. Its purpose is to create a structure of “folders” that our company organizes administratively. For example, we will create an organizational unit for each section or department of my company. Also, all users and team accounts will be created or moved to this new site. In this way, when we open the administration of the active directory we will see a much more organized structure than the default.
The following table shows the organizational units that will be created with their respective team and user.
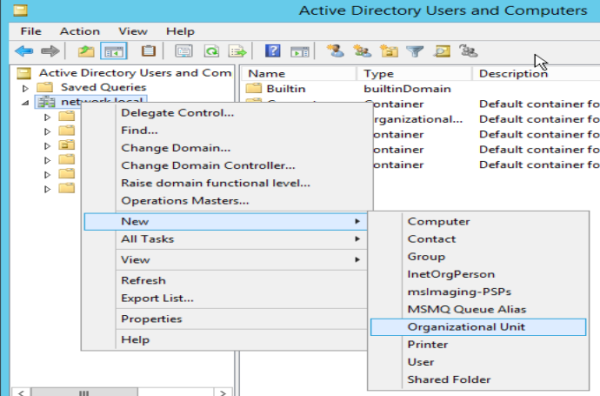
From the Active Directory users and computers window, we will create the two organizational units. From the domain name, we right click, choose the option and select the Organizational Unit option.
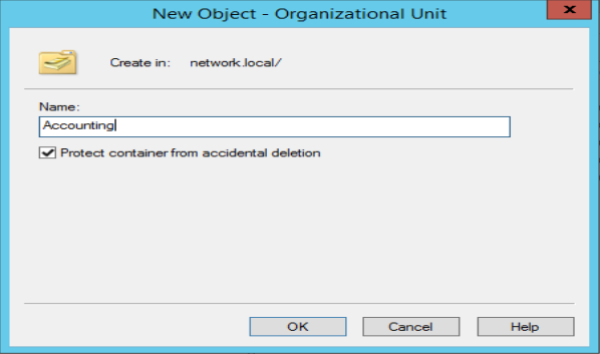
We put the name of the organizational unit.
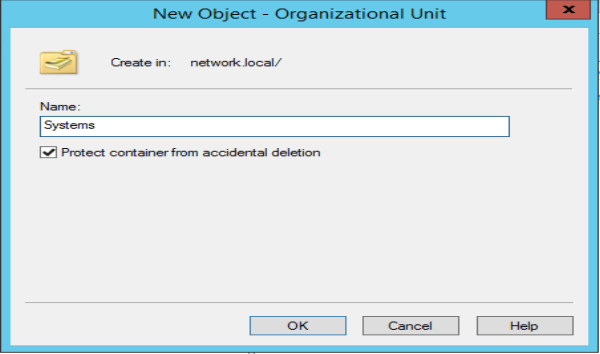
We also created the second organizational unit.
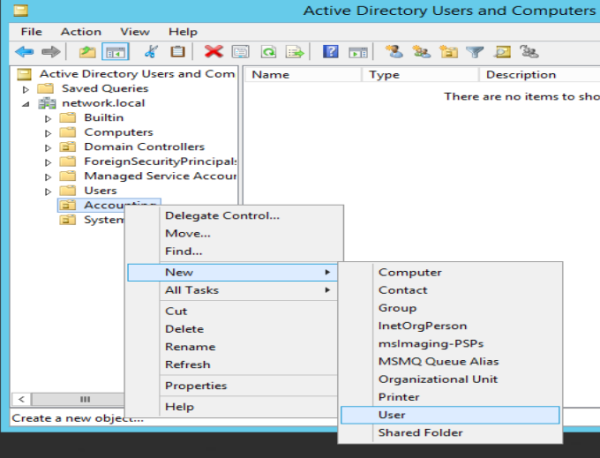
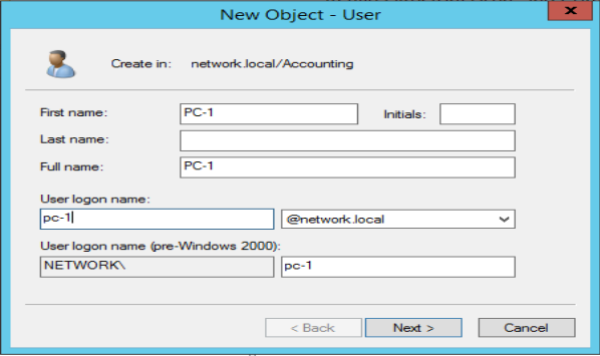
After creating the two organizational units, we will create the users for each unit. We create the user for PC-1 in the Accounting folder.
The user indicated in the previous table will be created.
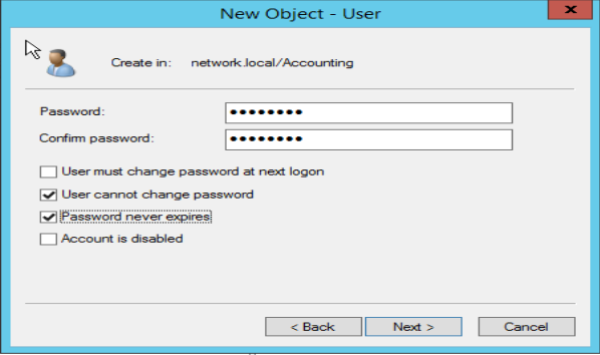
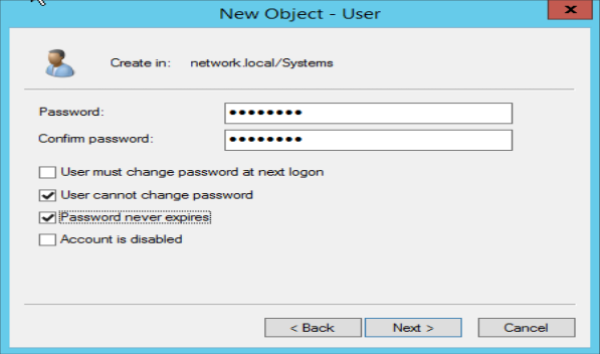
A password is set for that user. We select the options indicated there as considered.
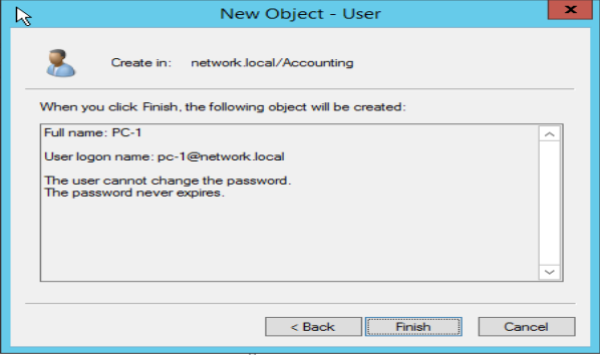
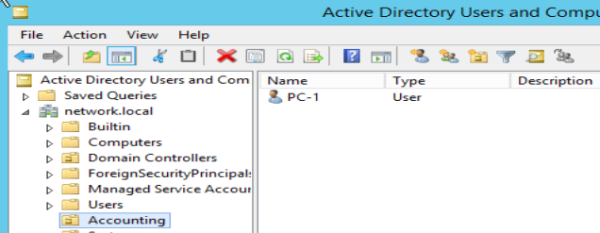
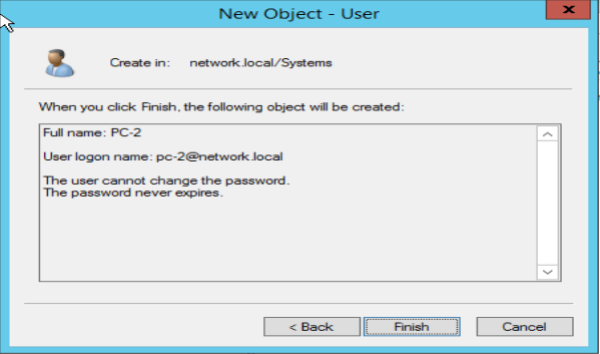
Then it shows us a summary of the user that we are creating and it will be reflected in the Organizational Unit.
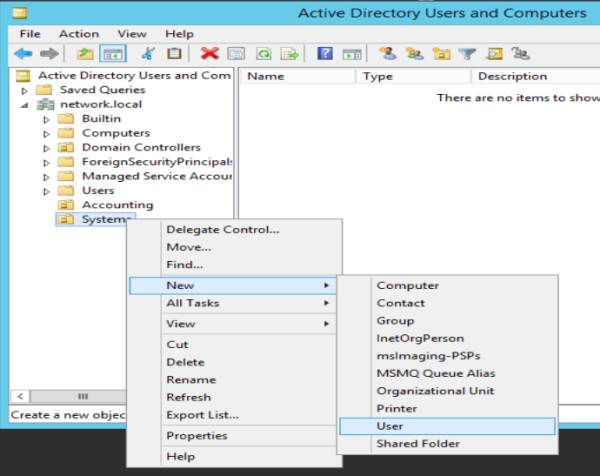
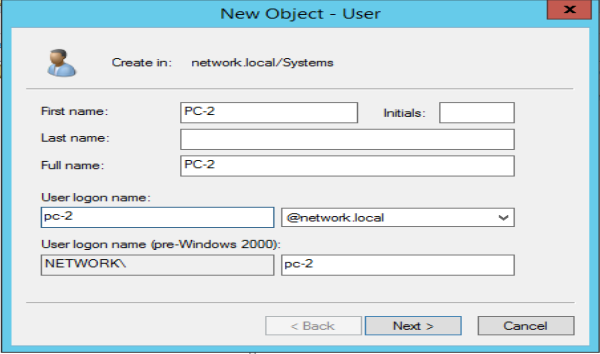
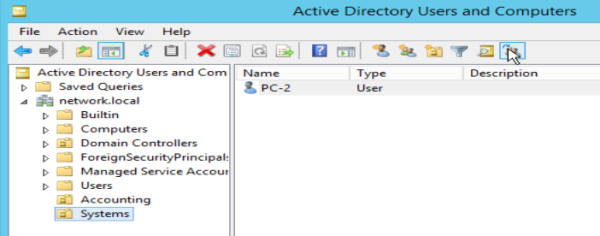
The same process is carried out by creating a user in the Systems folder.
4. Adding clients to the domain
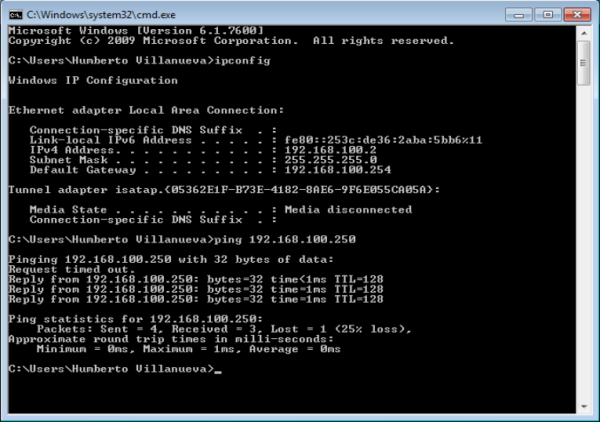
After establishing the Active Directory, we proceed to add the two computers to the domain. Likewise, the two computers check that they are taking an IP address by DHCP and that they can reach the Active Directory Server.
Connectivity tests on PC-1.
Connectivity tests on PC-2.
In the router we can verify the operation of the DHCP service. The following image shows the command and delivery result of the DHCP service.
4.1 PC-1 on the domain controller
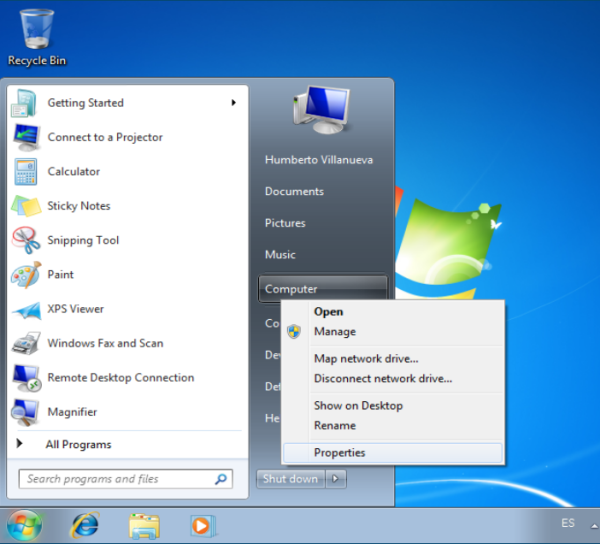
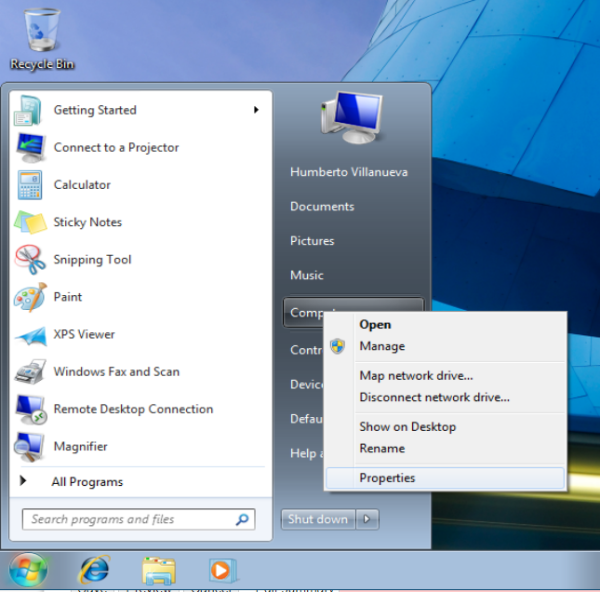
After checking connectivity, we proceed to include PC-1 in the domain. In the start menu, we go to Computer, right click and choose properties.
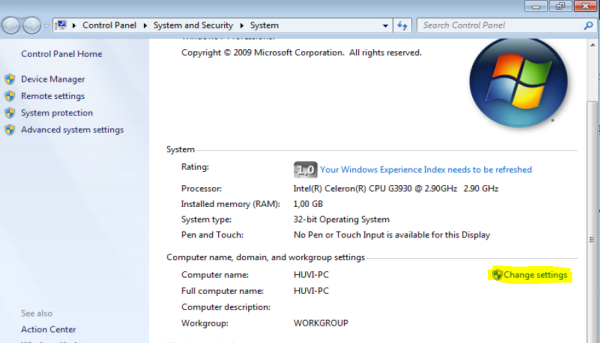
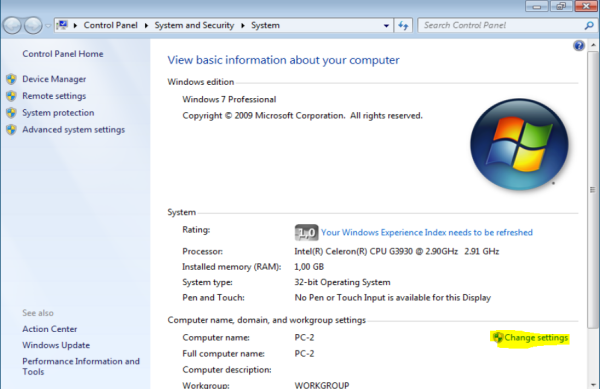
In the information of the computer name we select the option Change Settings.
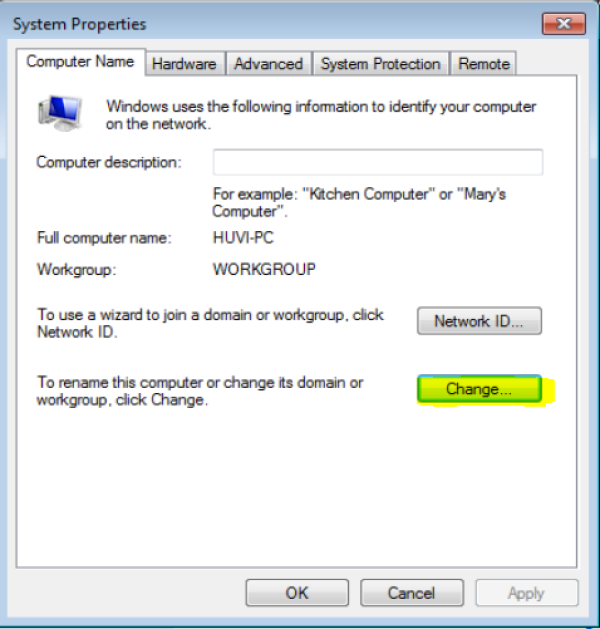
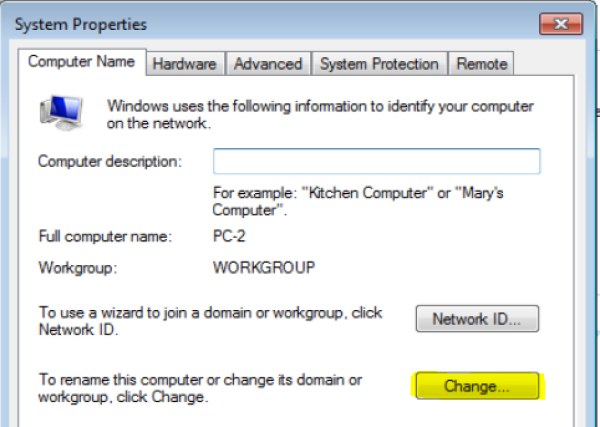
In the first Computer Name tab, we click the Change button.
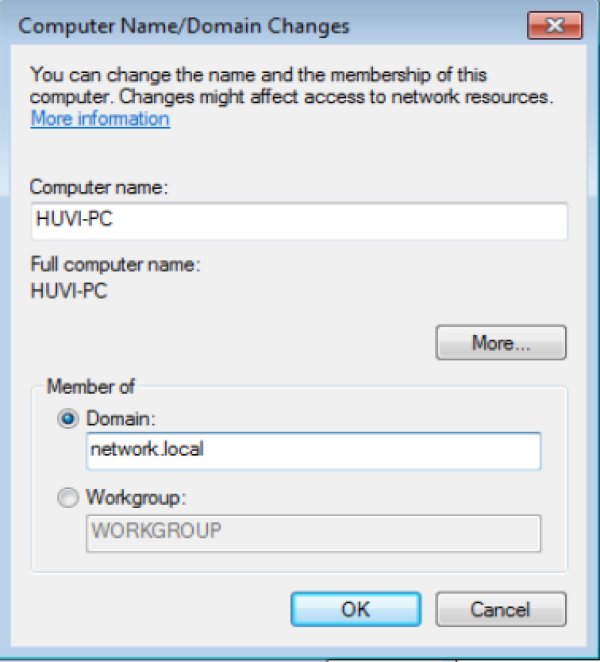
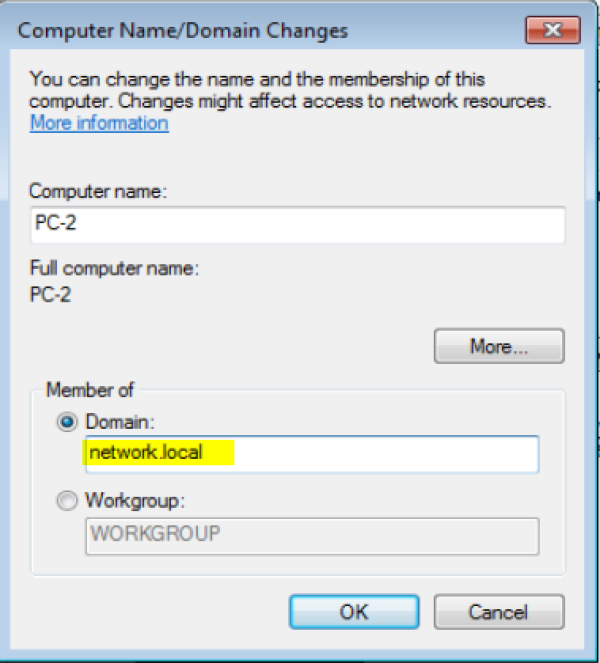
In the Member option, we select the Domain option and place the domain name established on the Server.
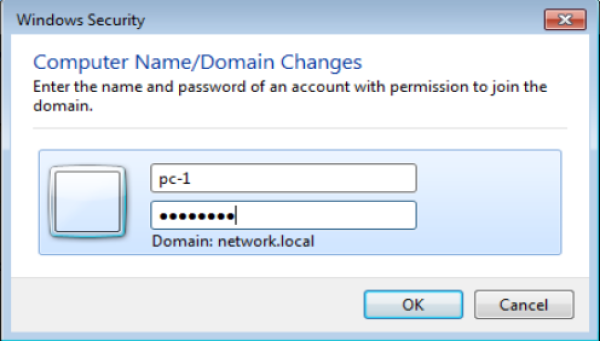
It asks us for the credentials that we have on the domain controller, we place the credential of PC-1 created in the accounting folder.
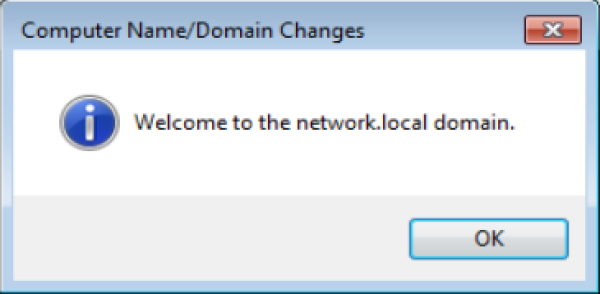
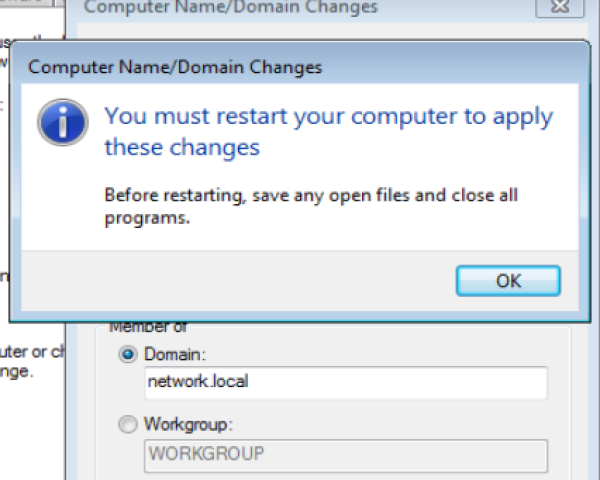
After validating, a welcome message to the domain appears and we restart the computer.
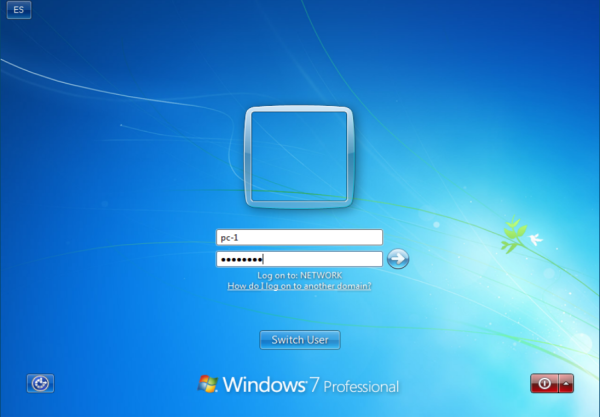
After restarting the computer, we authenticated with the domain credential.
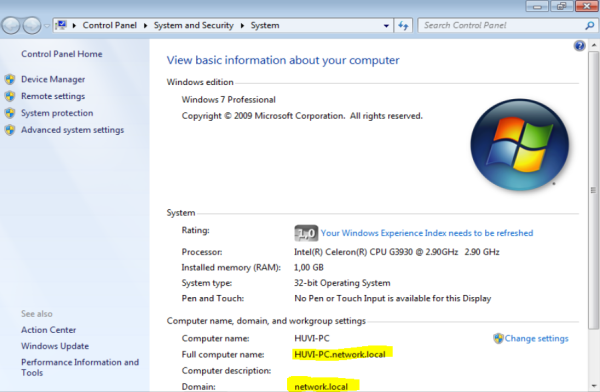
Computer PC-1 is fully in the domain.
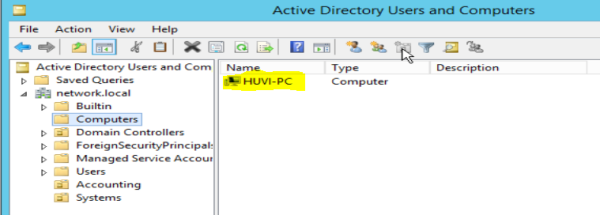
From the server, we verify that the computer is in the domain. From the Users and Computers window, we go to the Computers folder where our team will appear in the domain.
4.2 PC-2 on the domain controller
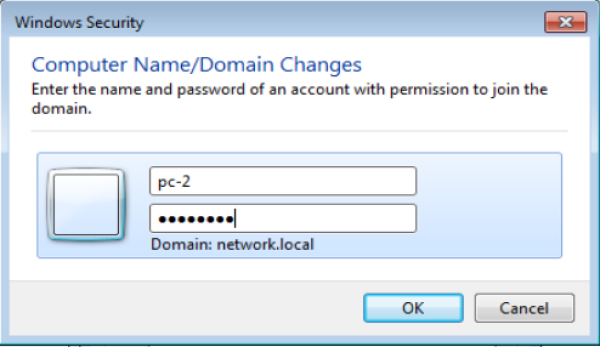
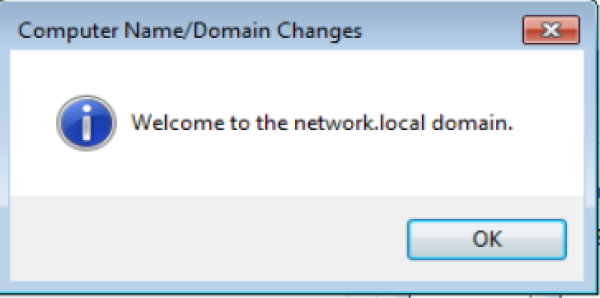
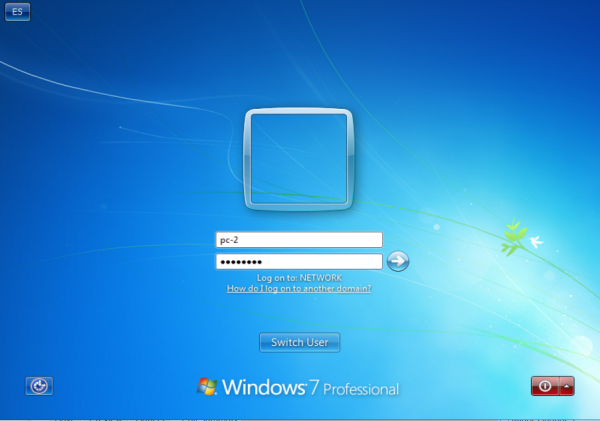
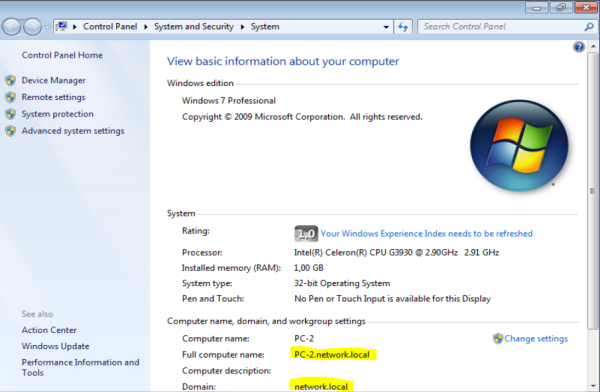
The same steps that were carried out in PC-1 are repeated.
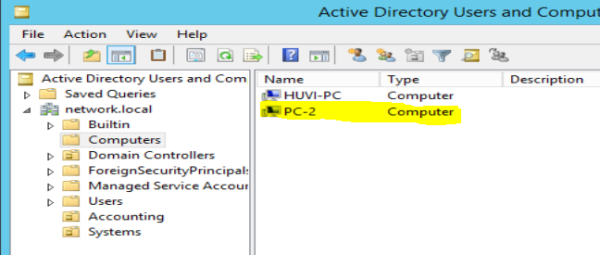
It is verified on the server.
— Humberto Villanueva 2020/11/04 03:50

